


If you have a MikroTik router, then it’s sometimes difficult to create simple queue with one by one IP address. It’s a difficult task. Also if you need to change bulk IP address in the queue, it sounds more terrific. So I wrote this article to make your life easier to maintain your MikroTik router easily. To add all IPs in your MikroTik Simple queue, just open your MikroTik RouterOS terminal and run the following script.
What is MikroTik Script?
MikroTik is one of the most used router for office and internet service providers that provides internet connectivity from provider to client. It’s massively customizable and every MikroTik router comes with an operating system that called RouterOS. You can save lots of time by creating and using MikroTik script that would do most of the tasks when you will run that on command line inside RouterOS.
MikroTik Simple Queue
To limit data rate or bandwidth for any specific IP address, MikroTik provides simple queue feature where you can easily limit bandwidth. If you want to provide a smooth bandwidth for every users in your network, you have to mastering yourself with this simple queue feature. You can limit, set priority, idle and busy time bandwidth utilization and so much more. Even by using MikroTik burst in queue system, you can give good user experience with lower bandwidth. But it’s not a just so simple as you think.
You have to learn how MikroTik script works and how simple queue feature works inside MikroTik RouterOS. Then you calculate your total upstream bandwidth, then build a queue based on your client group, implement and test them until all of your users enjoy fantastic internet using experience.
Queue Interface in MikroTik

To add a single IP address inside the MikroTik queue, you have to get a clear understanding about all the options and how it works. It’s not possible to discuss all those options in a single article but I will try to cover the primary fields and options for creating a single MikroTik queue for an IP address.
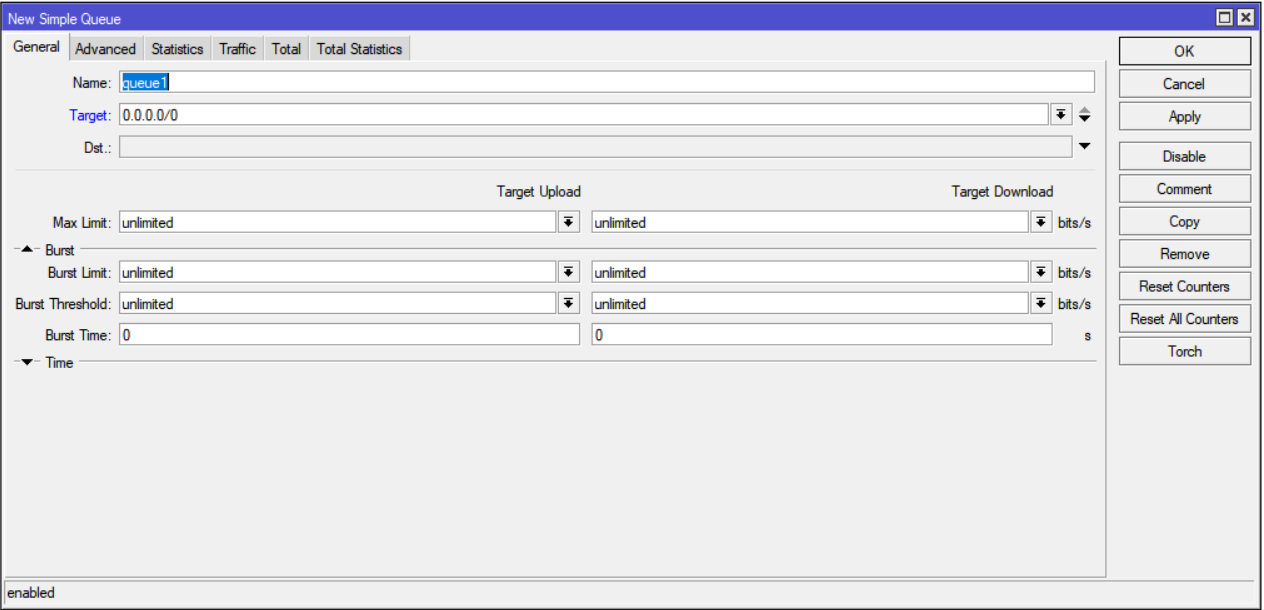
Available options to create a simple queue
- Name
It’s actually just a name of the queue. I myself use IP address for this name so easily I can identify the queue for that IP address for my network - Target
Very important options. Target is actually an IP address inside your network to whom you want to limit this queue for. For example, if you want to limit bandwidth for 192.168.1.23 then the target will be that IP 192.168.1.23. - Dst
Skip it. Because it provide you the way to limit for incoming and outgoing between Target IP and destination IP. For example, if you want to limit bandwidth in MikroTik for your user 192.168.1.23 only for specific IP address you can do that so. But remember each queue rule require you to create a separate queue. You can implement all queue for a single IP address in a single queue. I will explain later how to add bulk IP address in your MikroTik queue. - Target Upload (Max Limit)
That’s the key. It’s the limit you want to set for upload bandwidth for that specific Target IP address. For example, if you want to give an user (192.168.1.23) upload speed 5mb then you need to define that in this field. You can simply write 5M in this field or you can even set Unlimited upload speed for that user. - Target Download (Max Limit)
It’s the same for target upload option. It’s for the download bandwidth limit. For example, if you want to limit an user (192.168.1.23) download speed or bandwidth to 3mb you need to write 3M in this field as like as target upload options. Also you can set unlimited download limit for that particular IP address
This above 5 fields are important and if you understand the role and usage of those 5 fields you can setup MikroTik queue per IP address. Also from the right side you can write comment for this specific queue. For example, it’s a “Bob’s office Laptop”. It’s pretty useful.
Adding multiple IP in MikroTik simple Queue
Sometimes you can realize that to setup typically 253 queues individually is tough. It’s really tough for me and for most of the MikroTik expert. Also if you can manage your time to do that, think if you need to change the bandwidth package for your user or need to upgrade or downgrade bandwidth for all the IP address, then it’s a mess to do that manually. So what’s the easy way.
Fortunately, you are lucky because of MikroTik has it’s simple queue scripts to manage all the things for you. You can easily write a MikroTik script where you will make a loop for all IP address in your network and it will execute that specific commands in your script for all the IP address in less than a second.
MikroTik Simple Queue Scripts for all IP address
To add all IPs in your MikroTik Simple queue, just open your MikroTik RouterOS terminal.

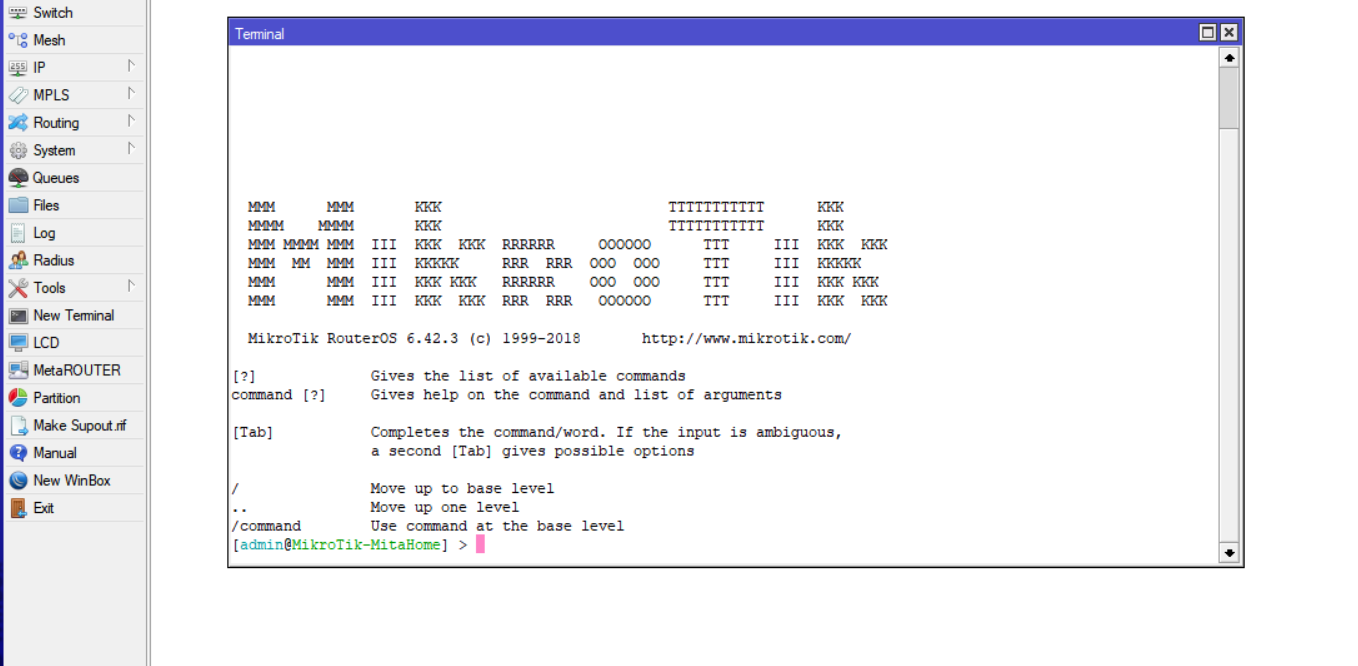
Commands to add all IP in queue
Here is the simple command to add all IP in MikroTik simple queue. In the MikroTik terminal, just run the following code. But before copy and paste the code, first copy the code in a notepad and change the IP address range and bandwidth values as you want based on your policy. Then run that command inside MikroTik terminal.
:for x from 1 to 254 do={/queue simple add name="queue-$x" max-limit=2M/2M target="192.168.1.$x"}Video Tutorial

Explanation of the commands and scripts
Here in max-limit variable you can define max speed upload/download. For example I used 2M for both download and upload. This simple loop script will easily add all of your IPs in your MikroTik Queue. After that you can manually modify when you need for any specific IP. This script will save you lots of time as it did for me. This is compatible with Mikrotik all version router board including v6.
As per the above command, 1 to 254 meaning the queue will be generated till 254. 192.168.1.$x is your IP address format. It can be different as per your setup. And max-limit=2M/2M meaning upload/download (2M/2M). Write a comment, if you don’t understand this and I will be happy to assist. Also if you still can’t execute this, provide your IP series, bandwidth upload/download limit so I can generate a script for you.
Scripts compatibility with MikroTik Model & RouterOS version
There are lots of models and versions of MikroTik and RouterOS available publicly. So I have tasted this MikroTik Simple Queue scripts on the following models –
- hEX lite
- hEX, hEX PoE lite, hEX S, hEX PoE
- PowerBox
- RB2011iL-IN, RB2011iL-RM
- PowerBox Pro
- RB2011iLS-IN, RB2011UiAS-IN, RB2011UiAS-RM, RB3011UiAS-RM
- RB4011iGS+RM, RB1100AHx4, RB750
- RB1100AHx4 Dude Edition
- CCR1009-7G-1C-PC, CCR1009-7G-1C-1S+PC, CCR1009-7G-1C-1S+, CCR1016-12G
- CCR1016-12S-1S+, CCR1036-12G-4S
- CCR1036-8G-2S+, CCR1036-12G-4S-EM
- CCR1036-8G-2S+EM, CCR1072-1G-8S+
Also it’s compatible with RouterOS upto v6.
Conclusion
Mikrotik made it easy to manage and limit bandwidth. To write queue script for mikrotik should not be any harder tasks for anybody. You can learn more about Mikrotik terminal from Mikrotik website. Effective bandwidth management is important to provide your user a consistent internet connectivity.

Please write your comment in the comment box below if this works for you. And it would be helpful for others. I hope, this MikroTik bandwidth management script will also help you in all the way you need.
Read more articles on MikroTik


MikroTik Simple Queue Script – Add All IP at Once

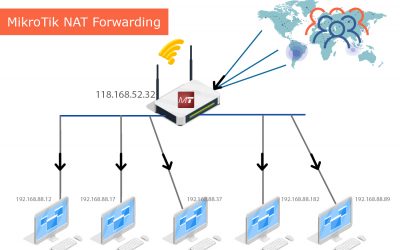
MikroTik Port Forwarding (NAT) & Access from Internet
